

Most store teams want one of two things from Google Sheets: a live-enough copy of orders, products or customers that everyone can read, or a place to edit products in bulk and send the changes back. Shopify's own CSV export and import cover a one-off, but they get tedious by the third repeat.
A Google Sheets Shopify integration takes over that repeat work. This guide walks through five methods, from the manual CSV round trip to Shopify apps, automation platforms, the Shopify API and a scheduled Skyvia import. We'll also show Shopify Flow, because Shopify's own free app can already put a row in a sheet every time an order comes in.
Short on time? The table at the end lists each method next to the job we'd use it for.
Why Connect Google Sheets and Shopify?
Without going into too much detail — it makes your day-to-day work with Shopify easier. After all, running a store means constantly maintaining your data in many ways, including product updates, inventory management, sales performance, and more. So how exactly can connecting Shopify with Google Sheets help?
Bulk Product Management
In fact, Shopify does offer built-in tools for bulk product management, but these can feel clunky compared to working in a real spreadsheet. First, they are limited to Shopify’s interface and CSV workflow.
Second, they fall behind in terms of functionality. Third, they lack the flexibility and speed when it comes to bulk edits. While in Sheets, you can use formulas, copy/paste across hundreds of rows, apply conditional formatting, and manage data much faster.
Automated Reporting
It is definitely one of the biggest time-savers. Instead of repeating the same “export CSV → upload → filter” process, your reports just refresh on their own.
And Shopify’s built-in options already cover a wide range – from simple order vs. revenue graphs all the way to advanced profit and customer-cohort analysis. Pairing that power with Google Sheets means you can customize, combine, and share those insights without the manual grind.
Data Backup
An essential feature, especially considering that Shopify does not provide store-level backups. While the platform itself does have disaster-recovery backups, security of individual stores is the responsibility of store owners. By syncing with Google Sheets, you create a safety pillow that will keep you afloat amidst a rainy day.
Collaboration
Google Sheets really shines here. Not only does it allow simultaneous collaboration in real-time, but also supports live chat between participants, provides email notifications and version history.
Add in mobile access on iOS and Android, and it becomes a natural hub for collaboration across your business.
Data Analysis
Finally, Google Sheets brings visual data analysis into the mix. By turning raw numbers into charts, graphs, and pivot tables, it helps highlight trends and patterns that could fall through the cracks when presented in spreadsheets.

Methods for Connecting Google Sheets to Shopify
Below, we’ll look at five ways to connect the two platforms – from dead simple to more technically advanced.
The right choice depends on how hands-on you want to be, how often you need your data synced, and what kind of setup you’re working with.
Method 1: Manual Export/Import
Manual integration is the most straightforward approach – it doesn’t require anything from you except a bit of time and patience.
And while the word “manual” may sound outdated in the age of automation, this method is still alive and well, and often relied on in certain cases.
Step-by-step guide
Here’s how it works:
- Export data from Shopify:
- In your Shopify admin, go to the section you want to export — for example, Products, Orders, or Customers.
- Click Export and choose the format (usually CSV for Excel, Numbers, or other spreadsheet programs).
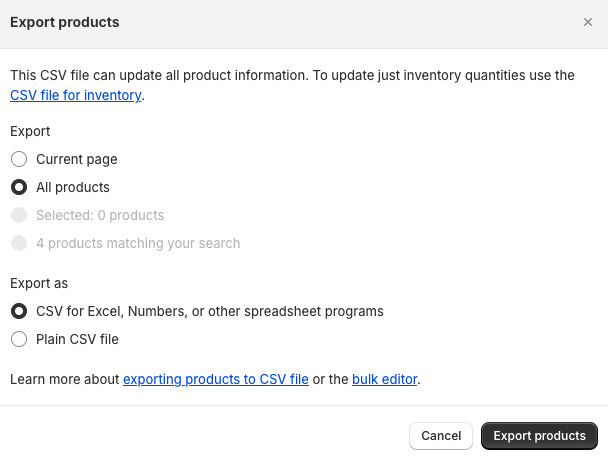
Shopify will generate a CSV file that you can download to your computer.
- Import data into Google Sheets:
- Open Google Sheets and create a new spreadsheet.
- Go to File → Import → Upload, then drag and drop your CSV file or choose it from your device.
Once uploaded, Google Sheets will display your Shopify data in table form – ready for sorting, filtering, or analysis.
Best for
Small-scale operations and one-time exports; smaller stores that only need to analyze or back up data occasionally.
Pros
- Completely free.
- No setup or additional tools required.
Cons
- Slow and error-prone.
- Not scalable for large stores.
- No possibility of live connection and automated updates.
Method 2: Using a Shopify App
Native apps are always preferred over third-party solutions because they’re safer, deeper, and easier to use. The Shopify ecosystem includes over 8,000 purpose-built apps – the programs developed specifically for Shopify, with its API and data structure in mind.
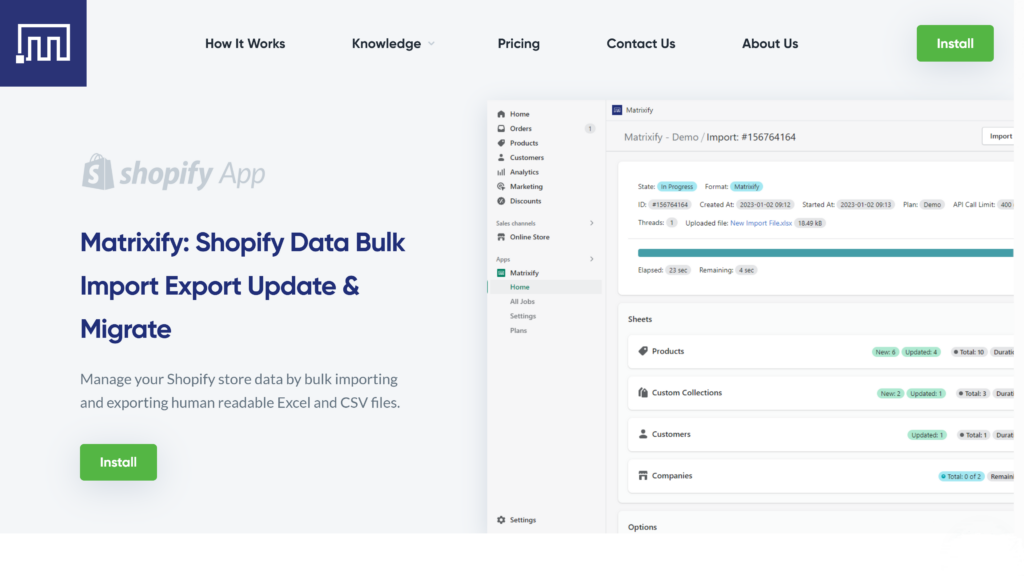
One of the most popular tools in this space is Matrixify. It lets you upload, edit, and export products, orders, customers, collections, and more – all in bulk, with just a few clicks. But there’s a bit more to it than basic import/export: Matrixify can migrate entire stores, preserve relationships between products and collections, and update metafields — things that CSV or Zapier automations can’t handle gracefully.
Best for
Merchants who manage large stores and need an easy way to handle regular bulk operations with no-code.
Pros
- Purpose-built for Shopify.
- Excellent for bulk uploads, edits, and exports.
- Easier to use compared to manual or script-based setups.
Cons
- Can be pricey, depending on your store size and needs.
- May have a learning curve.
- Adds another tool to your stack to maintain and update.
Method 3: Automation Platforms
For those who would rather skip the technical part, automation platforms like Zapier and Make.com offer a no-code way to connect Google Sheets and Shopify.
Acting as middlemen between your apps, these tools automatically pass data back and forth based on the rules you define – called “zaps” in Zapier or “scenarios” in Make.
Automation platforms operate on an event-based principle, where one system triggers a defined action in another, for example: if X happens in app A, do Y in app B. This makes them perfect for lightweight, task-based automations, such as:
- Adding a new row in Google Sheets, when a new order is created in Shopify.
- Updating Shopify inventory, when a row is updated in Google Sheets.
- Adding new customers to a Google Sheet, when a new customer signs up in Shopify.
Best for
Merchants who want to automate simple workflows between Shopify and Google Sheets.
Pros
- Very easy to use.
- Wide range of integrations with other platforms beyond Shopify and Sheets.
- Can be set up in minutes.
Cons
- Costs can rise quickly with frequent data syncs.
- Has limited data mapping and transformation options.
Method 4: Direct API Integration
An API is a programmatic way for different systems to interact with each other – to exchange data and perform actions automatically. This communication happens through direct requests between systems over the web, following clearly defined protocols and rules – a kind of programmatic etiquette in the machine world.
The beauty of connecting via the Shopify API is that you can read, create, update, or delete your store’s data programmatically, without using the admin panel. You get accurate, up-to-date information, refreshed exactly when you need it – hands-free.
You can set this up using Google Apps Script – a developer tool designed to build Google Workspace integrable apps. With a bit of luck and JavaScript, you can pull data directly from Shopify’s API into your spreadsheet. Or, alternatively, use a no-code helper like Apipheny if coding isn’t your thing.
Best for
Store owners or developers who want full control and flexibility over how data flows between Shopify and Sheets.
Pros
- Highly customizable and powerful.
- Allows for real-time syncing.
- Can automate any kind of data transfer.
- Cost-effective if you already have technical know-how.
Cons
- Requires coding skills (especially if you go the Apps Script route).
- Can be complex to set up and maintain over time.
Method 5: The Skyvia Solution
And finally, Skyvia – a comprehensive data integration platform that fills the gaps left by other methods and turns them into advantages.
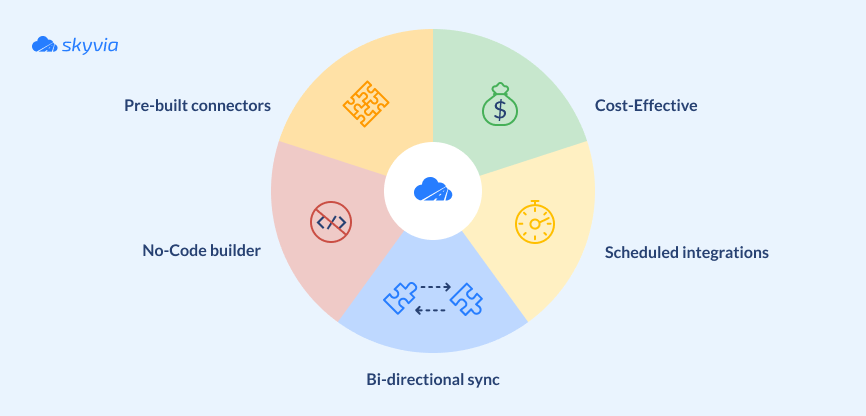
With its no-code interface and a set of pre-built connectors, Skyvia offers a balanced mix of speed, simplicity, and power – all at an affordable price.
Key Features and Benefits
- Automated, fast and flexible → unlike the time-consuming, non-scalable manual workflows.
- User-friendly and easy to start → no complex setup or learning curve.
- No-code → vs coding skills required in direct API integrations.
- Affordable and cost-effective → unlike pricey automation platforms.
Step-by-step guide
- Sign in to your Skyvia account.
- Create connections to your data sources: click +Create New, and choose Connection.
- For Shopify: select Shopify from the list of connectors. Enter your store’s full myshopify.com domain, paste the Client ID and Client Secret of an app you created in the Shopify Dev Dashboard, and click Sign In with Shopify.
- For Google Sheets: select Google Sheets from the list of connectors. Sign in with Google and specify the spreadsheet name.
Note: Each Google Sheets connection is linked to a concrete spreadsheet. Make sure you specify the correct one when creating the connection.
- Create a new integration: click +Create New and choose Import.
- Specify Shopify as the source and Google Sheets as the target (or vice versa).
- Click Add new to create an import task. For this example, we’ll copy data from Shopify’s Customers object into Google Sheets.
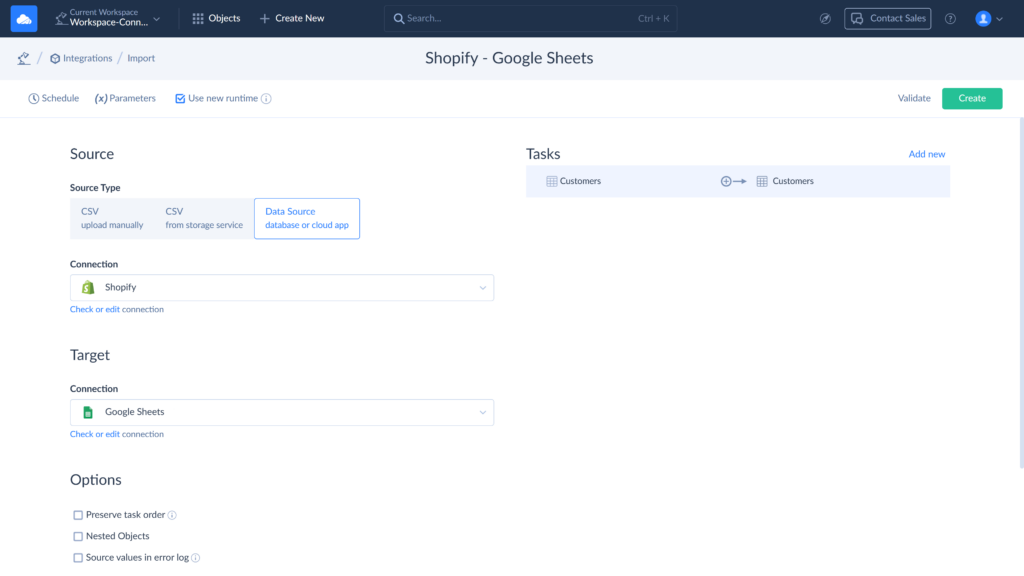
- In the visual editor configure your integration and map Shopify fields to Google Sheets fields.
- Set up a schedule to run the import automatically.
- Save and run the integration.
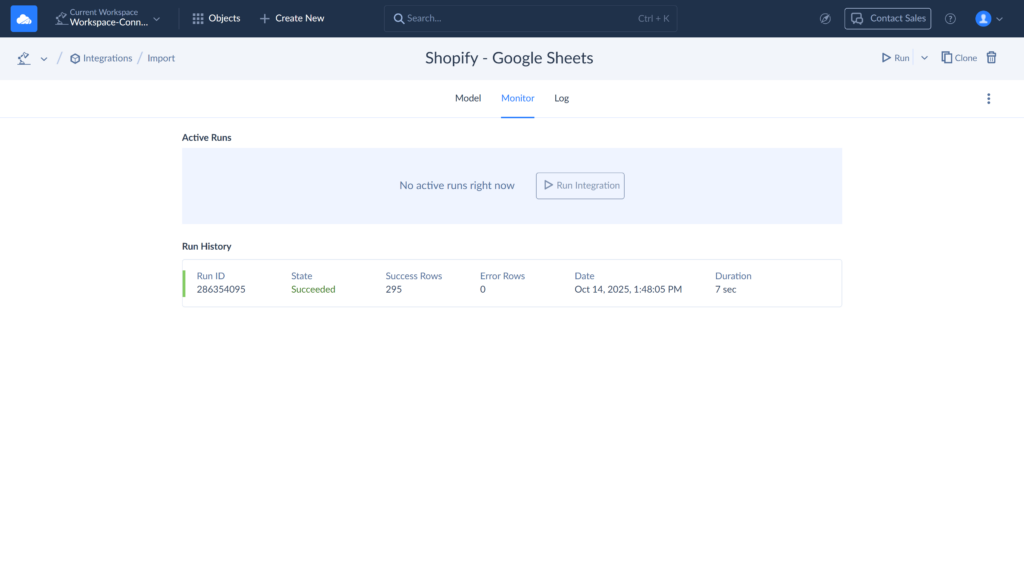
- Check the results on the Monitor tab.
Best for
Businesses of all sizes, who seek a user-friendly, flexible solution to automate data updates between Shopify and Google Sheets.
How to Log Shopify Orders in Google Sheets with Shopify Flow
Shopify actually has its own automation app for this. Shopify Flow costs nothing on the Basic, Grow, Advanced and Plus plans, and a Google Sheets connector comes built in. The piece you want is its Add row to spreadsheet action. It writes one row per workflow run and pairs with any trigger, which means an "Order created" workflow can record each new order in a sheet with no third-party tool involved.
Here's the setup, start to finish:
- Get Shopify Flow from the Shopify App Store, then start a workflow that uses the Order created trigger.
- Next comes the Add row to spreadsheet action, along with a Google account that has edit rights on the spreadsheet. Google will ask for consent next. Don't untick "See, edit, create, and delete all your Google Sheets spreadsheets", even if it looks broad, since that's the setting behind the 403 error.
- Take the spreadsheet URL straight from the address bar, and spell the tab name exactly as it's shown, because Flow only writes to a tab that exists.
- Under Row contents, type the order fields you need with commas between them. A comma means a new column.
- Turn it on and place a test order; nothing proves the mapping faster.
Missing rows, or rows in odd places, tend to come down to four causes:
| Symptom | Cause | Fix |
|---|---|---|
| One value spreads over several columns | A comma inside the value, such as in an order note | Strip commas with a Liquid filter, for example {{ order.note | replace:",", " " }} |
| New rows start in the wrong column | Blank cells at the start of the sheet's last row | Fill or remove the blank cells, and avoid sending empty values |
| You need one row per product, not per order | The action writes one row per run | Wrap it in a For each loop over the line items |
| 429 or 500 errors | Too many requests, or a sheet with too many rows or fields | Check how large the sheet has grown and how often the workflow fires |
The main limit: Flow sends data one way and only appends. The Google Sheets action can add rows and nothing else. Edit a cell in the sheet and Shopify never hears about it, and an order that changes after Flow logged it keeps its first row. An order log is where Flow shines. Product edits going into Shopify, or an inventory table that refreshes on a timer, are better handled by a Shopify app or a Skyvia import (Methods 2 and 5).
Choosing the Right Method for Your Business
Now that we’ve explored five ways to connect Shopify with Google Sheets, let’s quickly sum up which method works best for which task.
| Tasks you need to perform | Suggested method |
|---|---|
| Occasional small-scale operations, one-time exports | Manual |
| Regular bulk uploads, Shopify-specific tasks | Shopify app |
| Automation of simple workflows on the event-based principle | Automation platforms like Zapier or Make |
| Regular large-scale syncs with full control over data flows | API integration |
| Versatile data integration tasks with powerful data transformation options | Skyvia |
Conclusion
Connecting Shopify with Google Sheets is a smart, convenient way to manage your store data – from performing bulk updates and scaling processes to keeping your reports always up to date. Add automation to the mix, and it gets even better, freeing up your time for what really matters: growing your business.
In short, it’s all the benefits with none of the usual headaches – unless you’re feeling a little nostalgic for the good old days of manual data transfers.
Ready to supercharge your Shopify store with the power of Google Sheets?
Try Skyvia for free today and see for yourself how easy data integration can be.

FAQ for Shopify and Google Sheets integration

Can my Google Sheet show Shopify stock by location?
It can. Shopify keeps a separate count at every location, so the same hoodie might be plentiful in the warehouse and nearly gone at the pop-up shop. Skyvia reads those counts from the Locations_InventoryLevels object. Filter it on Location_Id and the sheet lists only the stockroom your team actually reorders for.
Can I get Shopify Analytics reports into Google Sheets?
Yes, but only as a download. Each report under Analytics and Reports has an Export button, and of the formats Shopify offers for most reports (CSV, XML, JSON Lines, Parquet), CSV is the one Google Sheets opens. On the legacy Finances reports (Sales, Taxes and Payments), choose Full report over Current page, which adds columns the screen hides.
Can several Shopify stores feed one Google Sheet?
Yes, with one connection per store. In Skyvia, a Shopify connection is tied to a single myshopify.com domain, so the US store and the EU store each get their own connection and import. We like one tab per store in the same file, plus a column with the store’s name, so a combined report still shows each order’s store.