Setting Up OData Endpoint
After you have registered your account, setting up an OData endpoint is as easy as the following three steps that usually take just a minute:
Skyvia Connect — the Simplest Way to Integrate Cloud and Database Data to Salesforce via Salesforce Connect!
In 2014 Salesforce introduced Salesforce Lighting Connect (which later became Salesforce Connect) — a service that allows linking external data to Salesforce and using them as external Salesforce objects. That enabled users simply to link their data stored in other solutions and applications as external objects instead of copying this data to Salesforce. Now Salesforce Connect allows working directly with the live external data from Salesforce interface.
Salesforce Connect requires external data to be available either via custom Salesforce Connect adapter or via OData protocol. OData is an open protocol for working with data over the Internet via RESTful APIs, supported by a number of data-related applications.
Some cloud applications allow working with their data via OData directly, like Dynamics 365, but most don’t. Popular database servers also don’t support OData directly. If one wanted to work with their data directly, the solution would be to create a web service, working with their data via their native interfaces and providing their data via OData interface. Such solution requires time for implementing a web service and also requires some efforts for hosting and managing this service.
Skyvia Connect is a connectivity-as-a-service solution that allows you to expose your data via the OData protocol almost instantly, with no coding and very little configuration. Besides, being a cloud solution, it does not require you to care about service hosting and management.
Skyvia Connect provides both read and write data access via OData protocol to a number of cloud CRMs, accounting, marketing, e-commerce and other applications, and such databases as SQL Server and SQL Azure, MySQL, PostgreSQL. Thus, using Skyvia Connect and Salesforce Connect together you can integrate your cloud or database data into Salesforce with nearly no efforts! All the configuration is done in a convenient GUI and takes minutes instead of days required to implement a custom OData service for your data.
After you have registered your account, setting up an OData endpoint is as easy as the following three steps that usually take just a minute:
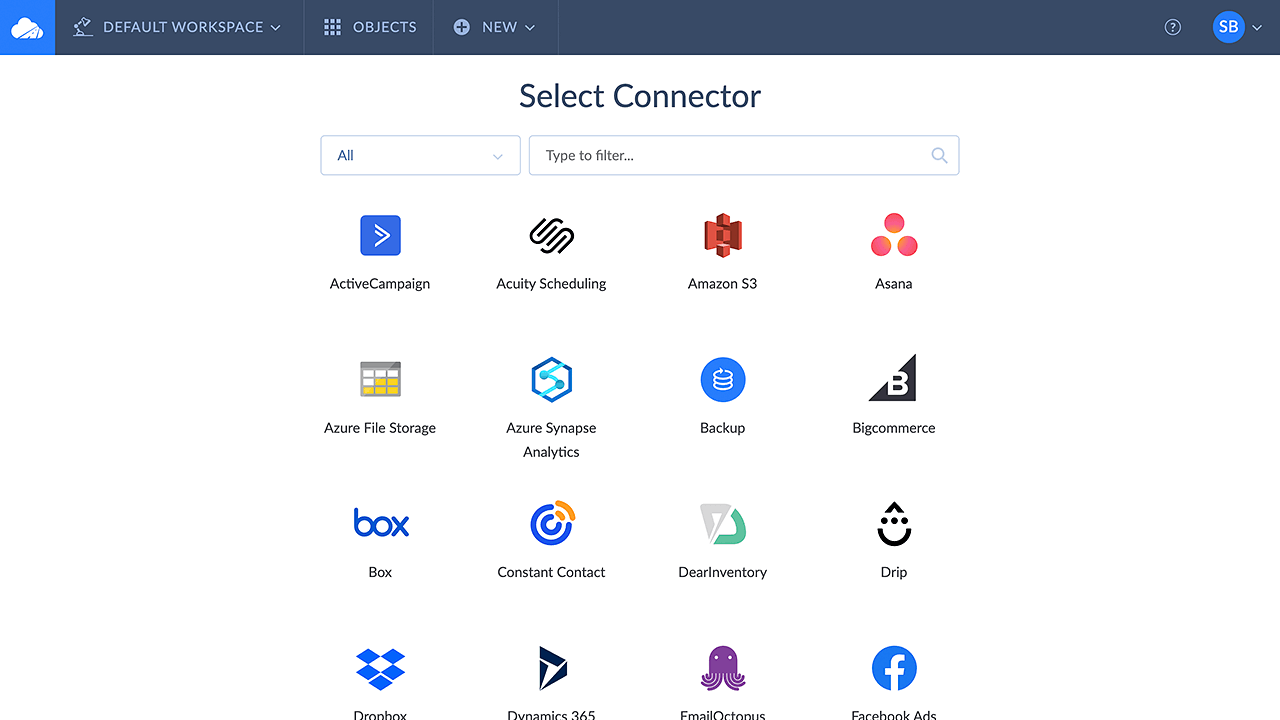
Select or create a connection to your data source.
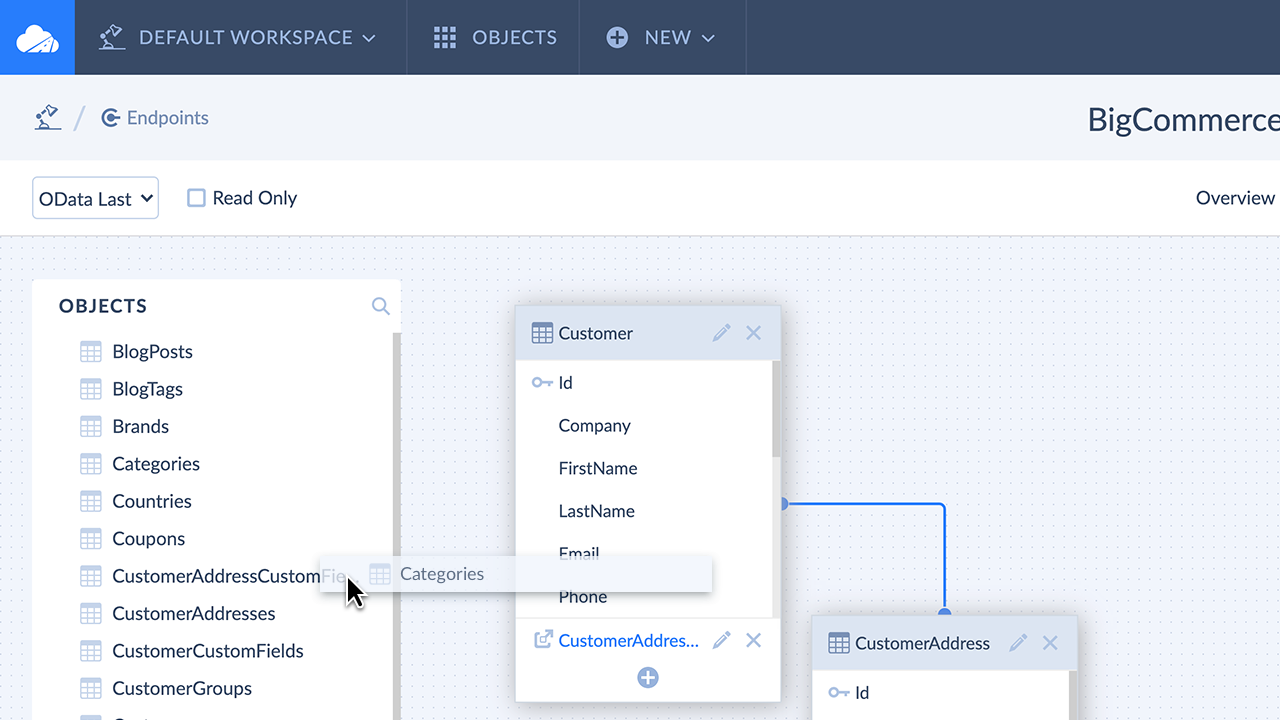
Drag the objects you want to expose to the diagram. You may show or hide fields of these objects from exposing.
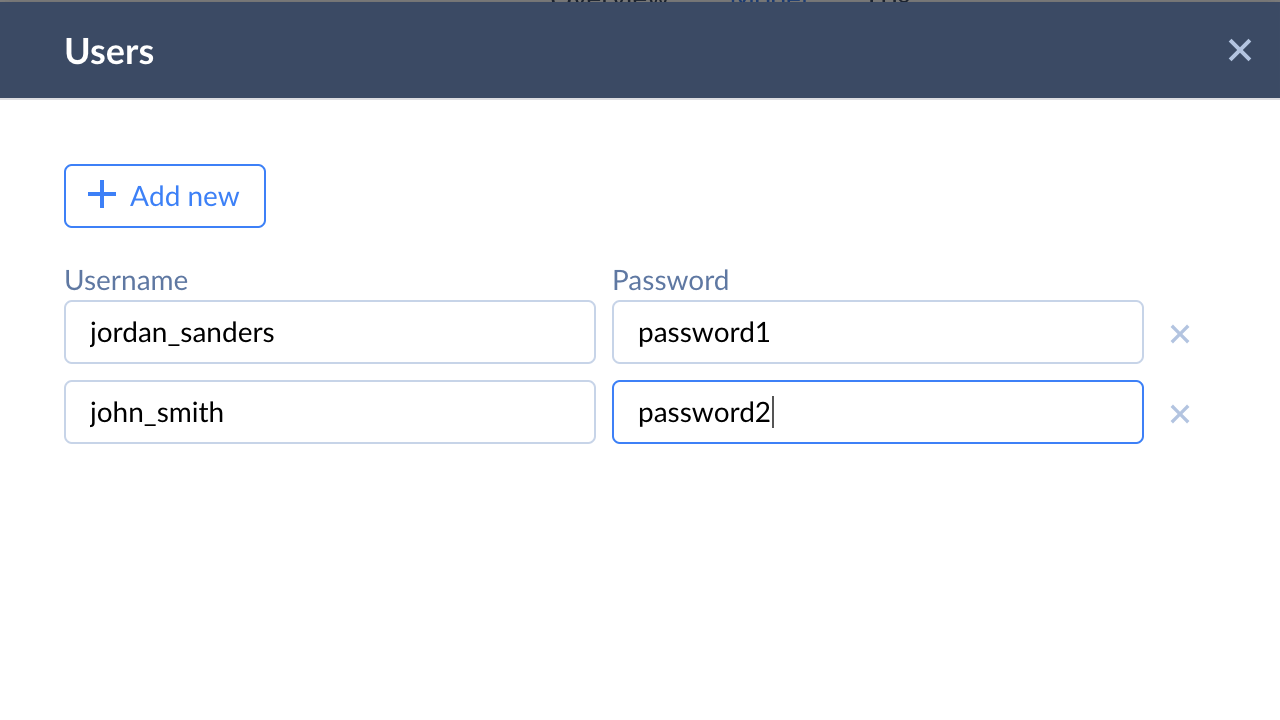
Optional. Create user accounts with passwords for your endpoint to protect it from unauthorized access and/or limit access to it by IP addresses and ranges.
Here is a detailed tutorial on how to link a Skyvia Connect endpoint to Salesforce via Salesforce Connect.
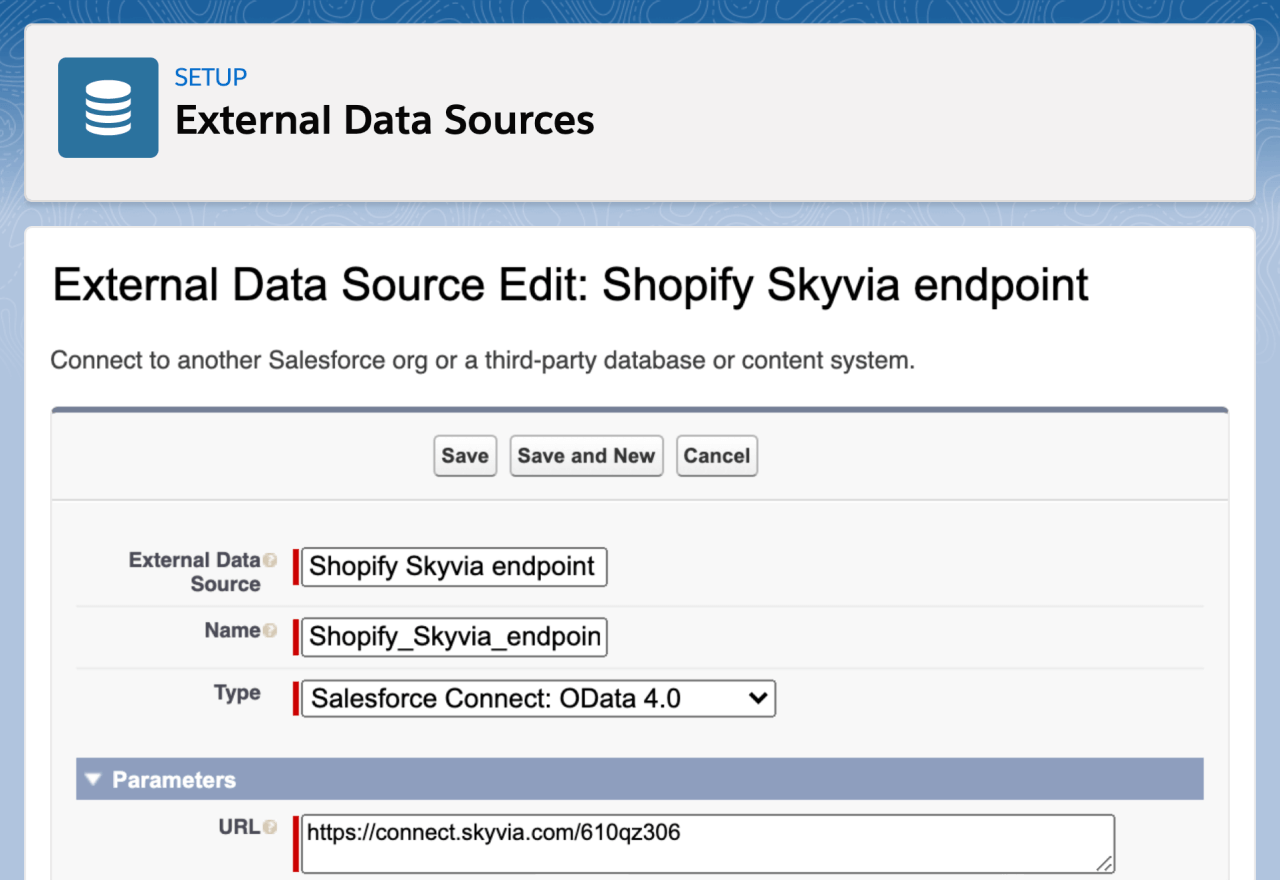
Create an external data source in Salesforce with Type set to Salesforce Connect: OData 4.0 and specify the link to the endpoint. Specify authentication settings if necessary.
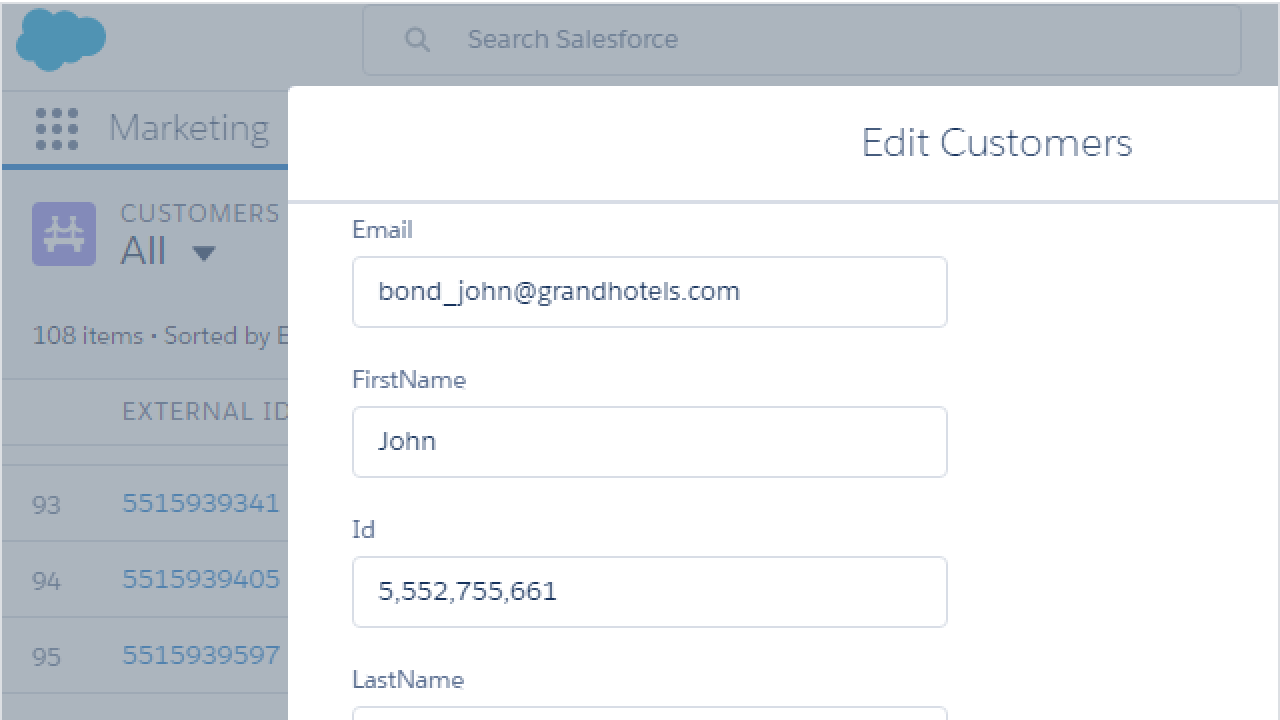
External objects are created in Salesforce automatically. You may add custom tabs for them and work with their data in Salesforce as with native Salesforce objects.
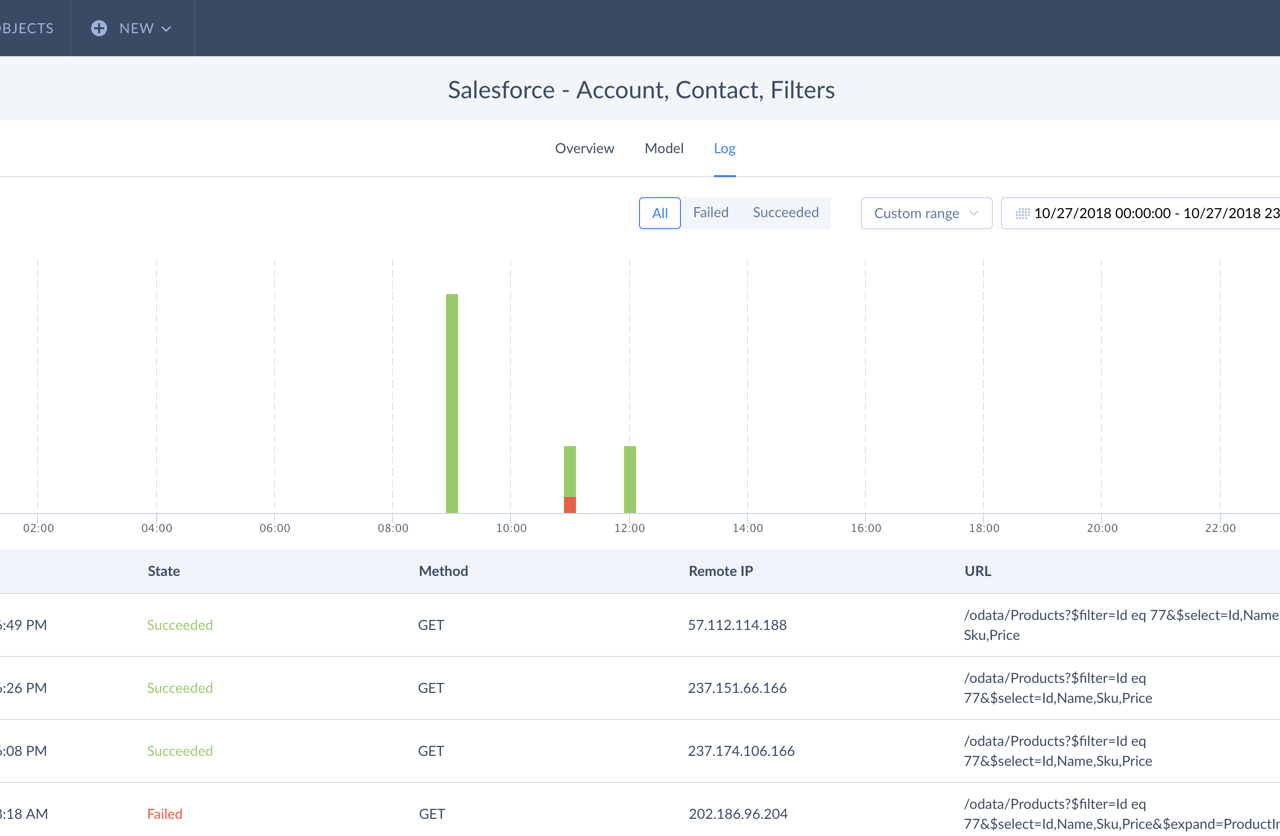
Skyvia provides a log of all the endpoint access operations and allows you to view the endpoint activity as a simple diagram or a detailed log.