Tutorials • by Serhii Bykov • July 15, 2023
For many companies, Salesforce remains the most popular CRM provider to manage relationships and interactions with customers. Realizing its importance for the community worldwide, we have made a simple step-by-step tutorial on Salesforce data export.
Export Data to CSV
With Skyvia, you can easily export data from Salesforce to CSV files, which can be further downloaded to your computer or automatically placed to some file storage. The CSV data format is useful because of its relative simplicity and universal cross-platform accessibility. Moreover, pulling data from Salesforce to a CSV file is a convenient way to analyze the data later.
To get data out of Salesforce, you need to create an export integration that will perform export of Salesforce data. When creating an export, Skyvia allows creating several export tasks in one integration and, thus, exporting several Salesforce objects – accounts, contacts, leads, attachments, etc. – in a single export operation. When selecting Salesforce objects, you can select either all of their fields or some of them, you can specify various filter conditions, which can be as complex as you may ever need. You are also free to export binary data – export them as an archive with binary files and a CSV with exported non-binary fields.
What is also convenient is that you can schedule data export from Salesforce to execute on a regular basis. The export will run automatically on the specified time. If the Salesforce connection becomes invalid or some errors happen within the integration, you will receive notifications to your account email or to other additional emails you have specified.
5 Steps to Extract Data from Salesforce
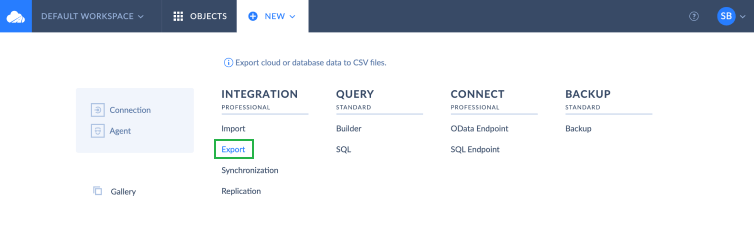
After signing in to Skyvia, you create an export by clicking +NEW in the top menu and selecting Export in the Integration column.
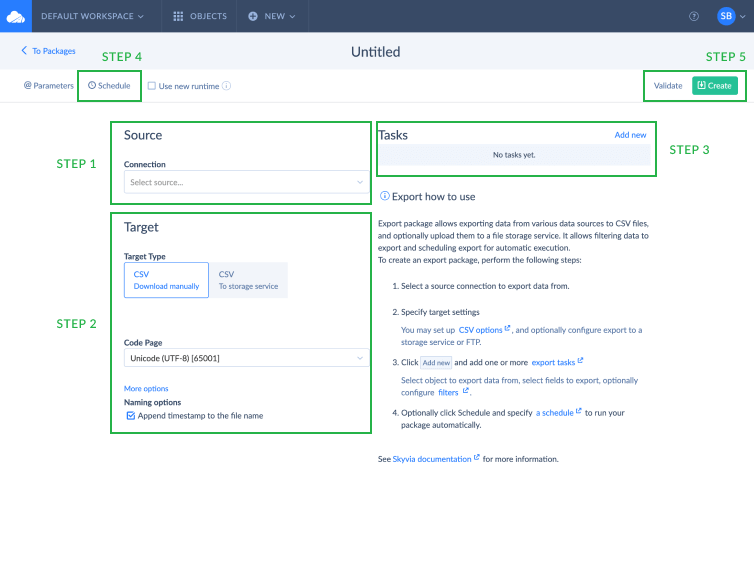
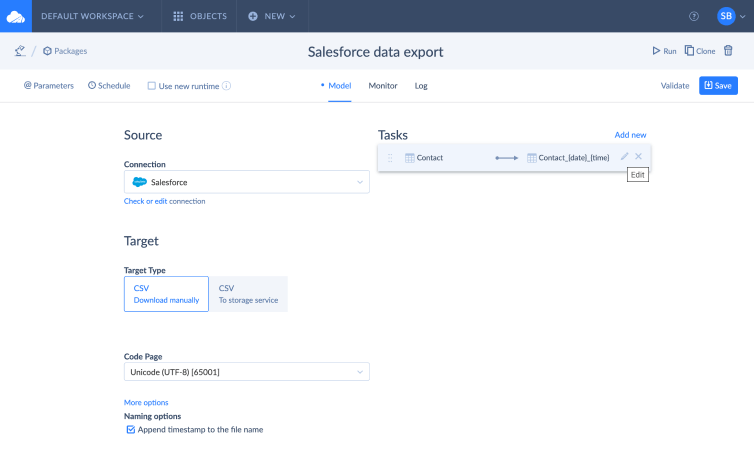
The integration editor opens up. It allows you to select/create source connection, specify target settings, add export tasks, schedule the integration for automatic execution and use additional options if necessary. Among other things, here you can enter the integration name or leave it Untitled.
Look at the screenshot below and follow the steps to successfully create an integration and export data from Salesforce.

Selecting/Creating Source Connection
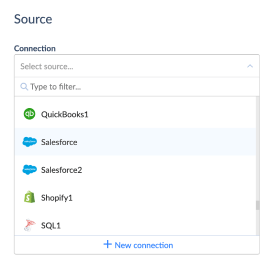
Under Source, click the Connection drop-down list and either select the existing Salesforce connection or create the new one. To create a new one, click the +New Connection link at the bottom of the connection drop-down list.
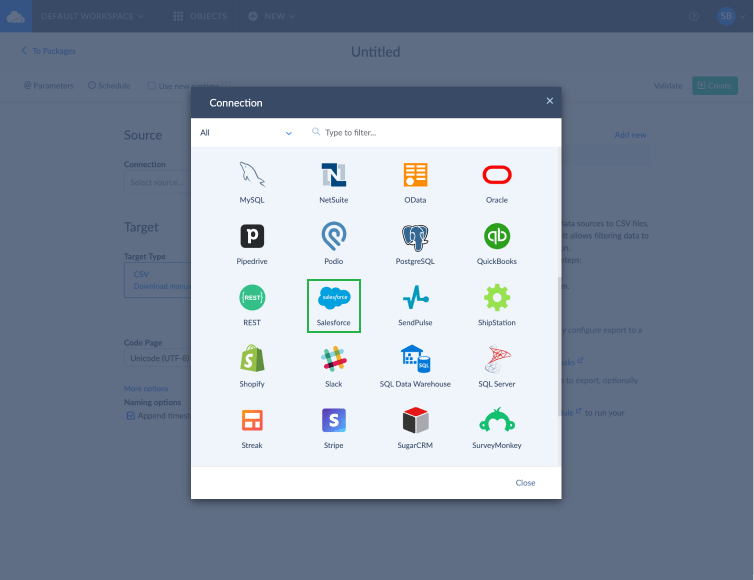
After clicking the +New Connection link, the Connection window opens. Search for Salesforce and select it from available sources.
As soon as you do it, you are automatically transferred to the Salesforce Connection window, in which you can specify required parameters.
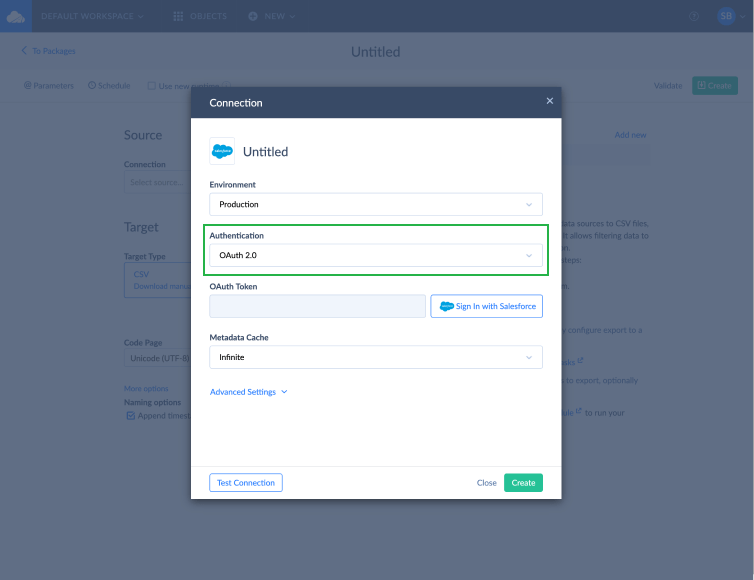
In the Salesforce Connection window, perform the following steps:
- Click Untitled and specify the connection name.
- Select the Salesforce environment type you want to use – Production, Sandbox or Custom.
- Select authentication method to connect to Salesforce – either OAuth 2.0 or User Name & Password. If you don’t mind storing your Salesforce credentials on Skyvia server, select User Name & Password.
If you prefer not to store your credentials, select OAuth 2.0. After that, click the Sign In with Salesforce button below and log in to the Salesforce website in the opened browser window. The OAuth token is generated automatically and will be used for authentication. It is available only if the OAuth 2.0 authentication is selected.
- Optionally, specify Metadata Cache parameter. This parameter determines for how long the cached metadata for the connection is considered valid. By default, metadata cache never expires – Skyvia resets it automatically.
- Click Advanced Settings and reset available parameters if required.
- Select to use Bulk API or SOAP API. By default, Bulk API checkbox is selected. Bulk API is based on REST principles and optimized for loading or deleting large sets of data. To find more information about the Salesforce connection parameters, click here. Additional information about Bulk API can be found in Salesforce.
- At the end, test Salesforce connection and click the Create connection button.
Specifying Target Settings
Skyvia offers two scenarios of Salesforce data export to target source. First scenario is when you are getting data out of Salesforce to CSV file(s), which can be further downloaded to your computer. This scenario is selected by default in Skyvia.
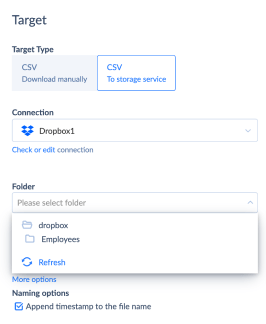
However, if you want to save CSV file(s) to a file storage service or FTP, use the second scenario and click CSV to the storage service in the target type. After this, click the Connection drop-down list and select a target connection name to export Salesforce data to. Skyvia supports exporting CSVs to Dropbox, Box, Google Drive, FTP, SFTP or any other.
After this, select the Folder where to place the result file(s).
In the export integration, you can optionally change default CSV options according to your needs. The CSV options include the following: CSV Separator, Text Qualifier, Row Delimiter, Locale, Code Page.
The most popular and frequently changed parameter is CSV Separator. It is a column separator, which can be a comma (,), a semicolon (;), a slash (/), or a vertical bar (|). By default, comma is used as a column separator. You can also enter a custom value to this box.
Adding Tasks to Export Accounts, Contacts or Leads from Salesforce
On the fourth step, we add tasks with objects we want to pull from Salesforce. In our tutorial, we will export Contacts from Salesforce as an example. However, you can export Accounts from Salesforce in the same way if required or any other Salesforce object. To add a task to the integration, click Add new on the left of the integration editor. The task editor window will open.
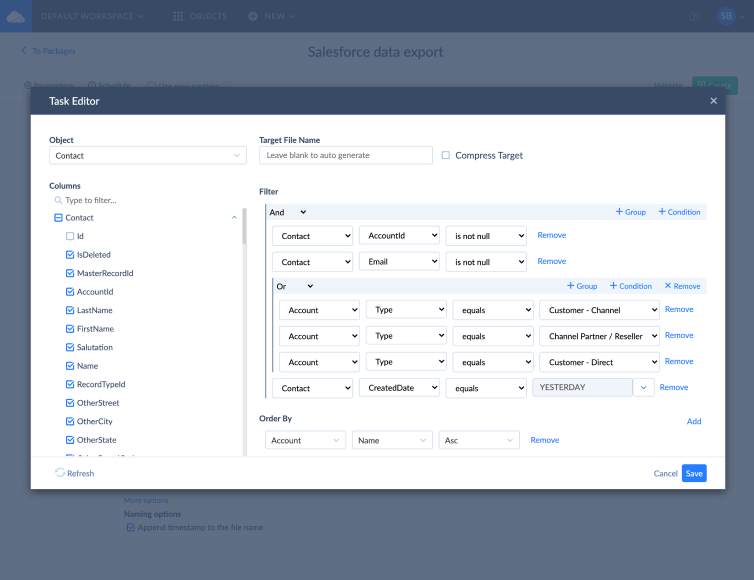
In the task editor window, perform the following steps:
- In the Object list, select the cloud object you want to export from Salesforce – e.g. Account, Contact, Lead, Attachment, etc. We export Contacts from Salesforce.
- Next select object fields, for example FirstName, LastName, Phone, Fax, Email.
- If required, select fields of the referenced object, for example Name and Type fields of the Contact.Account referenced object.
- Click +Condition to configure filters.
- Click +Group to add filter groups.
- When everything is ready, click Save to save the configured task.
One export can contain several tasks. That is why, if you want additionally to export Leads from Salesforce, click the Add new link to add a new task and select the Lead object. Configure this task in the same way as described above.
What is convenient is that the next time you want to export the same kind of data, the tasks will already be created within the integration, and it will just take you a click to run the integration.
Scheduling Salesforce Export
Skyvia also allows you to set a schedule for an integration to execute it automatically. This might be useful if you want to configure data export operations to run periodically or if you want to delay an operation to a later time.
Based on your needs, you can schedule the created integration for one-time or recurring executions. Recurring integration runs can be executed on a daily, weekly and monthly basis — once a day at a specific time or multiple times with intervals. You can select certain weekdays to schedule data export from Salesforce as well as to impose time period restrictions on the integration execution for a day.
When choosing Skyvia Salesforce data loader to schedule export, you will considerably save your time, money and efforts in the future.
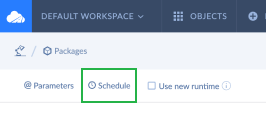
OPENING SCHEDULE EDITOR WINDOW
To set a schedule for an integration, click Schedule on the toolbar left side.
The schedule editor window opens. In our tutorial, we schedule the integration to execute automatically each workday at a certain time.
- Click Week under Run every and select corresponding check boxes next to the workdays.
- Specify certain time the integration should run on each workday. In our example, we have scheduled the integration to run at 10:00.
- Select options when you want to start the integration execution – Now or At a specific time.
- At the end, click Save to save your integration schedule.
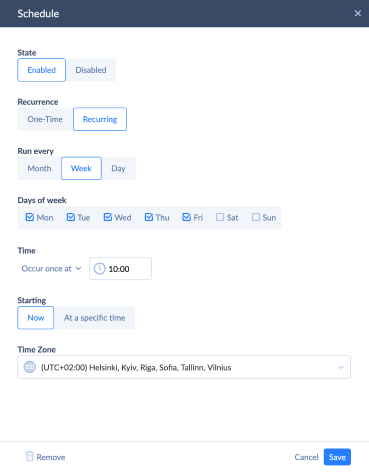
If you need to make the schedule inactive without deleting it, click Disabled.

Saving and Running an Export
When your integration for Salesforce data export is ready, click the Create button on the right of the page. After that, click Run to immediately run the integration or wait until the integration schedule starts.
As soon as the integration is created, you will see three tabs in the middle of the toolbar – Model, Monitor, Log.
Model tab shows source and target connections, tasks/schedule/parameters of the integration, etc. On this tab, you can edit your existing connections and tasks, select other connections or add new tasks to the integration, edit schedule, parameters, etc.
Monitor tab shows the current integration status and 5 most recent runs.
Log tab shows older runs or runs for a specified period.
DOWNLOADING EXPORTED FILE
Salesforce export file is available for manual download for 7 days since the integration run. After 7 days, the exported data will be lost. When exporting data to a CSV file, you can download the Salesforce result file manually in the following way:
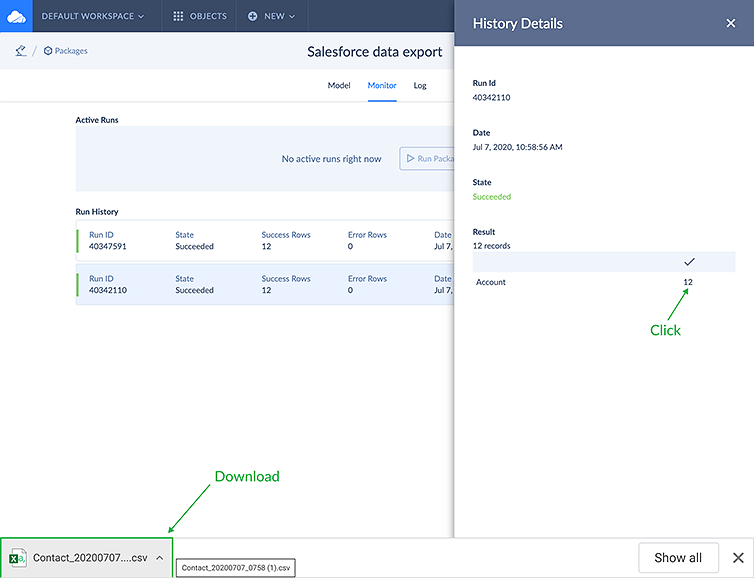
- Switch to Monitor or Log tab.
- Click the integration run you want to download the results of.
- The History Details window opens with the detailed information on a certain integration run.
- Under Result, click the number of records to download the result CSV file.
The integration is considered successful if the most recent run has loaded all the records successfully. It is marked as failed either when at least one record has not been loaded successfully, or when the integration has not been executed completely (for example, when its connection became invalid). In case of some errors, you will get notification to your email.
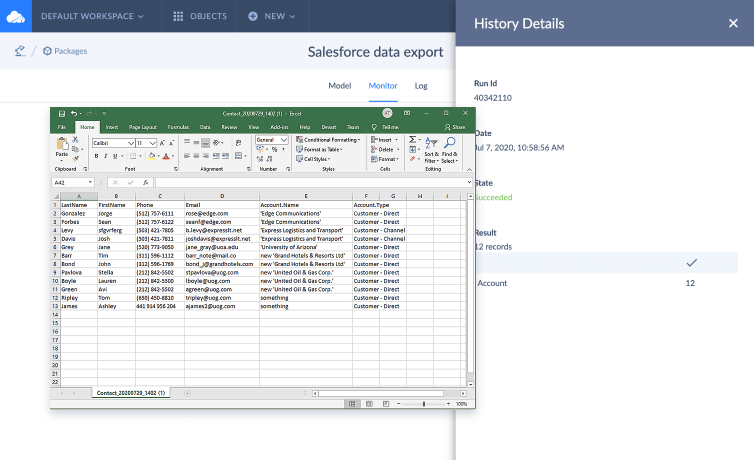
As a result, we’ve got a CSV file with all necessary data. The file contains Сontacts exported from Salesforce, which have such account types as Customer-Channel, Customer-Direct, Channel Partner/Reseller according to our filter conditions. We have scheduled the integration to run every workday (from Monday to Friday) at 10 a.m., exporting contacts created one day earlier, which means contacts created today will be exported to CSV file the next day at 10 a.m. It is very convenient and eliminates data duplication.